GOODWILL SPRING CLOTHING HAUL

diy
1. Black and White Plaid Button Down J.Crew Dress- $4.99


2.Blue and White Striped Button Down


3. Tan and White Striped Sweater


4. Polka Dot Dress


5. Polka Dot Skirt


LAST MINUTE DIY HALLOWEEN COSTUMES

diy
It's that time of year again! Halloween is only a weekend away and although I spend all year thinking about what I'm going to be and pinning ideas on Pinterest, it never fails that I wait until the last 1-2 weeks to decide on a costume. That would be fine if I wanted to just run into Party City or Walmart to buy a costume, but I love to DIY plus all the good costumes have been picked over by the non-procrastinating Halloween shoppers so it's nearly impossible to find anything good. But don't fear, if you're like me and waited because, in today's post, I've put together 3 costume ideas that are quick, and CHEAP!

COSTUME 1: FRENCH MIME


Silence is Golden, and so is this easy costume! I bet you already have all of these items in your closet, that if you wake up next week and realize it's October 31st, you have a costume all ready to go!

WHAT YOU"LL NEED:
  • Striped Shirt
  • Back Pants
  • Red Beret
  • Suspenders (I DIYed mine but I actually found some in Walmart's Halloween section for $3)
  • White Gloves (So I'm guessing you don't have these laying around... neither did I! Purchased for $4 at my local Halloween shop)
  • Liquid Eyeliner
  • Red Lipstick
  • Awkard Hand motions and facial expressions!

COSTUME 2: CANDY CORN


Earlier this month, Twitter got into a heated debate about this classic candy! But whether you love candy corn or think it should be flushed down the toilet, you'll look sweet in this easy costume, and even the candy corn haters will get a toothache!

WHAT YOU"LL NEED:
  • 3 Large T-shirts (I got mine from Goodwill)
    • White
    • Yellow
    • Orange
  • Party Hat (painted white with craft paint)
  • White Tights (optional)
You can either put some sewing skills to the test or break out the fabric glue for this DIY! Cut the top of the orange shirt and attach it to the middle of the white shirt and do the same with the yellow, but attach it to the bottom of the orange shirt to follow the Candy Corn pattern. Top with your white party hat. I also paired my shift with white tights to keep my legs warm!

COSTUME 3: RINGLEADER


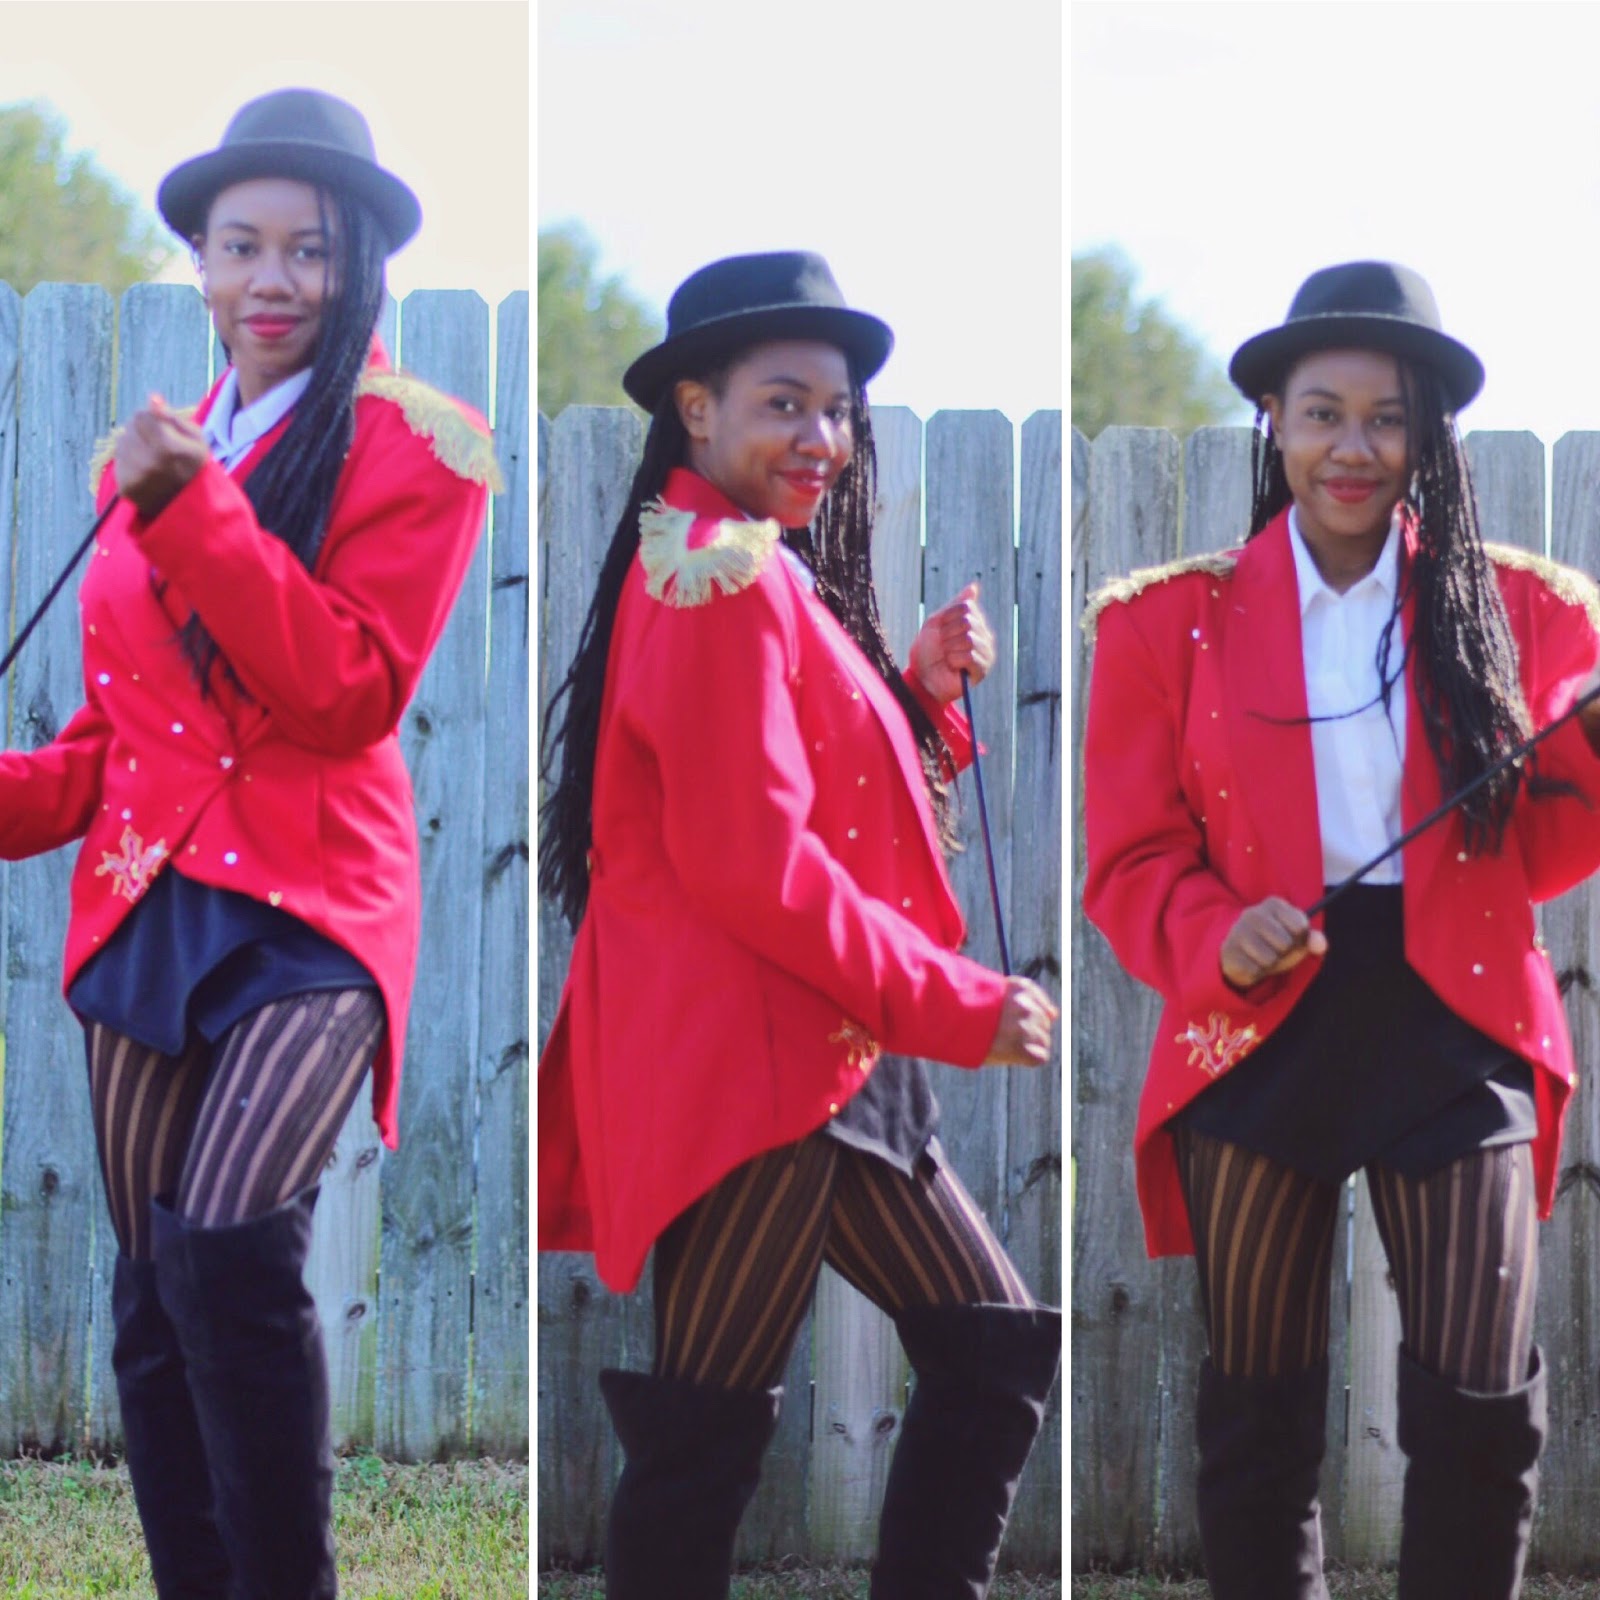
All eyes will be on you in the center of the Ring, like a Circus in this costume! This one requires a little more work because you'll need an old Red Jacket or Blazer you don't mind cutting up and decorating! 

WHAT YOU"LL NEED:
  • Red Jacket or Blazer (Again, I found mine at good ole Goodwill)
  • Gold Fringe and Decorative Trim
  • Black Hat
  • Black Shorts or Pants
  • Black Fashion tights (if you decide to wears shorts)
  • Black OTK or tall boots
  • DIY Riding Crop (cat dangle toy found at Dollar Store)
I ended up cutting the back of my blazer to give it that Tuxedo Tailcoat look and stitched the sides up with a sewing machine. And hot glue the fringe on the shoulders to make to Epaulettes! The Jacket was the only thing I had to DIY and it was pretty simple!

Be sure to check out my DIY Halloween Costumes post from last year for some more quickie costumes!

Hope you guys have a spooktackular Halloween!

SUMMER EARRING TRENDS + DIY BALL DROP EARRINGS

diy
This spring and summer has been all about the BOLD statement earring! From tassels, beads, balls and hoops I've noticed gorgeous pieces in all the stores and hanging from the ears of the stylish! In today's post I wanted to not only share some of the hottest trends out now and to expect in the coming months but show you guys how you can make some of your own pieces for less. I'm a huge fan of Bauble Bar jewels but I can never quite get over the fact that they're $30+ for earrings and not only is making your own cost efficient, but you can put a unique spin on them, that will have everyone complimenting and asking where did you get them? I always feel a little sense of pride when I tell people I made something myself and that they can too!

So here are some of the cutest trends and below we'll be making one of my favorites: the Ball Drop Earring!


Spring/Summer Earring Trends


DIY BALL DROP EARRINGS:


WHAT YOU'LL NEED:

  • 6 Mini Styrofoam Balls
  • 2 spoolsEmbrodiery String/Thread
  • Hodge Podge Craft Glue
  • 2 Ear Wire Hooks
  • 6  Wires
  • Wire Cutters 
  • Round Nose Pliers
STEP 1: ROLL one styrofoam ball at a time in Hodge Podge Craft Glue

I put down paper so not make mess!

STEP 2: WRAP the embrodiery thread in concentric (circular motion) at a starting point of your choice (this will be the top of the ball). Continue wrapping down the ball!

Excuse my gross fingers! Working with Hodge Podge can get a little messy!


STEP 3: Once you're FINISHED wrapping, let the ball dry for 5 minutes! While waiting for the ball to dry, wrap your others!

STEP 4: 3 WRAPPED BALLS can make an earring! Once all three balls are dry, insert a wire into each one, cut to size and loop the ends using the round nose pliers!


STEP 5: CONNECT each loop before closing, and LOOP the ear wire hooks on the last ball to become the top of the earring! Do it again to complete the pair and Voila! 


Love this SnapChat Filter!


Hope you enjoyed this post!


DIY FLORAL BUNNY EARS

diy
Happy Friday!
It's Good Friday so I had the day off and I thought why not do a fun DIY project for Easter?!

I love Bunny Ears, and they're pretty easy to find this time of year (with Easter and all!) but they all look the same, so I decided to spruce them up a bit by combining them with the ever popular head accessory of the spring: Flower Crowns!


These floral bunny ears are so easy to make, and it cost me less than $5 to make 6 of them because I purchased all my supplies from my local Dollar Tree!

What you'll need:


-Headbands (I bought a 6 pack of colored Headbands from the dollar store)

- White or your choice of color Piper Cleaners

- Artificial Flowers (how cool would it be to have real flowers?!)

-Glue Gun and Glue-sticks


Step  1: Fold Piper Cleaners in half to form a "triangle", then twist bottoms and form "Bunny Ears"


Step 2: Glue "Bunny Ears" to the Headband


Step 3: Glue Flowers in your choice of Arrangement to the Headband


 Quick and simple in 3 Easy steps! Hope you all try out this fun little DIY!

I wore them to work the next day and got so many compliments! I loved telling people that I made them myself!


Have a great Easter filled with Happiness, Joy and Gloss!


LAVENDER LEMONDADE AND LEMON FRENCH MACARONS

diy

Did you know my favorite color is purple? As a girly girl, I'm obsessed with pink but although my obsession with pink knows no bounds, I must admit I love purple even more, and I love lavender. It smells ah-mazing and it takes even better in lemonade.

As a southern, lemonade is a staple, especially for those spring/summer afternoons sitting on the front porch and soaking up the sunshine or after a long day of working the garden. This lavender lemonade is a great twist on the classic drink with an amazing color pay-off (no food coloring needed)!

This recipe is super easy and quick, so if you're thinking of serving this at a picnic or barbecue, you're guests will think you're a drink wiz and extra classy, without ever knowing it took you less than 10 minutes to make.


Since I made  Lavender lemonade, I thought a sweet lemon macaron would nicely compliment. Plus I love the color combo of Purple and Yellow!

Lemon Macarons with Vanilla Buttercream Filling


What you'll need:

Dry Ingredients:
  • 1 CupAlmond Meal/Flour
  • 1 2/3 Cups Powdered/Confectioner's Sugar
  • 1 Tsp Cream of Tartar


Wet Ingredients:

  • 1 Tsp Pure Vanilla Extract
  • Yellow Food Coloring
  • 1 Tsp of  Lemon Juice/ Lemon Zest
  • 3 Egg whites
  • 1/2 Heavy Whipping Cream
  • 2 Tsp Room Temperature Butter
Tools:

  • Electric Mixer
  • Piping Bag
  • Piping Tip
  • Parchment Paper
  • Cookie Sheet
  • Whisk

Step 1: Sift Almond Mill and Powdered Sugar

This step is particularly important for getting airy and light cookies! 

Step 2: Beat Egg Whites 


Step 3: Add Vanilla and Lemon Juice to Egg Whites


Step 4: Fold Wet Ingredients with Dry Ingredients 


Step 5: Add to a piping bag


Step 6: Pipe out Half-Dollar Sized Circles


Step 7:

Tap the Cookie Sheet a few times to release air bubbles

Step 8:

Patience Required... let macarons sit out for 30 minutes before baking, this a good time to Pre-Heat your oven to 300 degrees

Step 9:

Once macarons are no longer sticky to the touch, bake in the oven for 15 minutes

While Macarons are Baking... Make the Vanilla Butter Cream Filling:

-Just mix a room temperature stick of unsalted butter with 3 cups of Powdered/ Confectioner's Sugar, 1/4 cup of milk and 1/2 teaspoon of Vanilla extract with an electric mixer for 2-3 minutes

Step 10: Once your macarons are finished baking and you have the signs of a successful Macaron cookie: FEET!

Add your Vanilla Buttercream to a piping bag and pipe onto one cookie and use another to make a Macaron Sandwich! Voila, you have a Macaron cookie! Easy huh!

Now to make the Lavender Lemonade and it's even easier than the Macarons!

Lavender Lemonade


All you need is:

-1 teaspoon of Lavender Buds (try whole foods or a gourmet Grocery Store...don't worry, their super cheap!)

-3-5 Lemons or 1 cup of Lemon juice

- 5 cups of Water

-1/2 cup of Sugar

Step 1:

Boil your lavender buds in 2 cups of water and use a strainer to remove buds


Step 2:

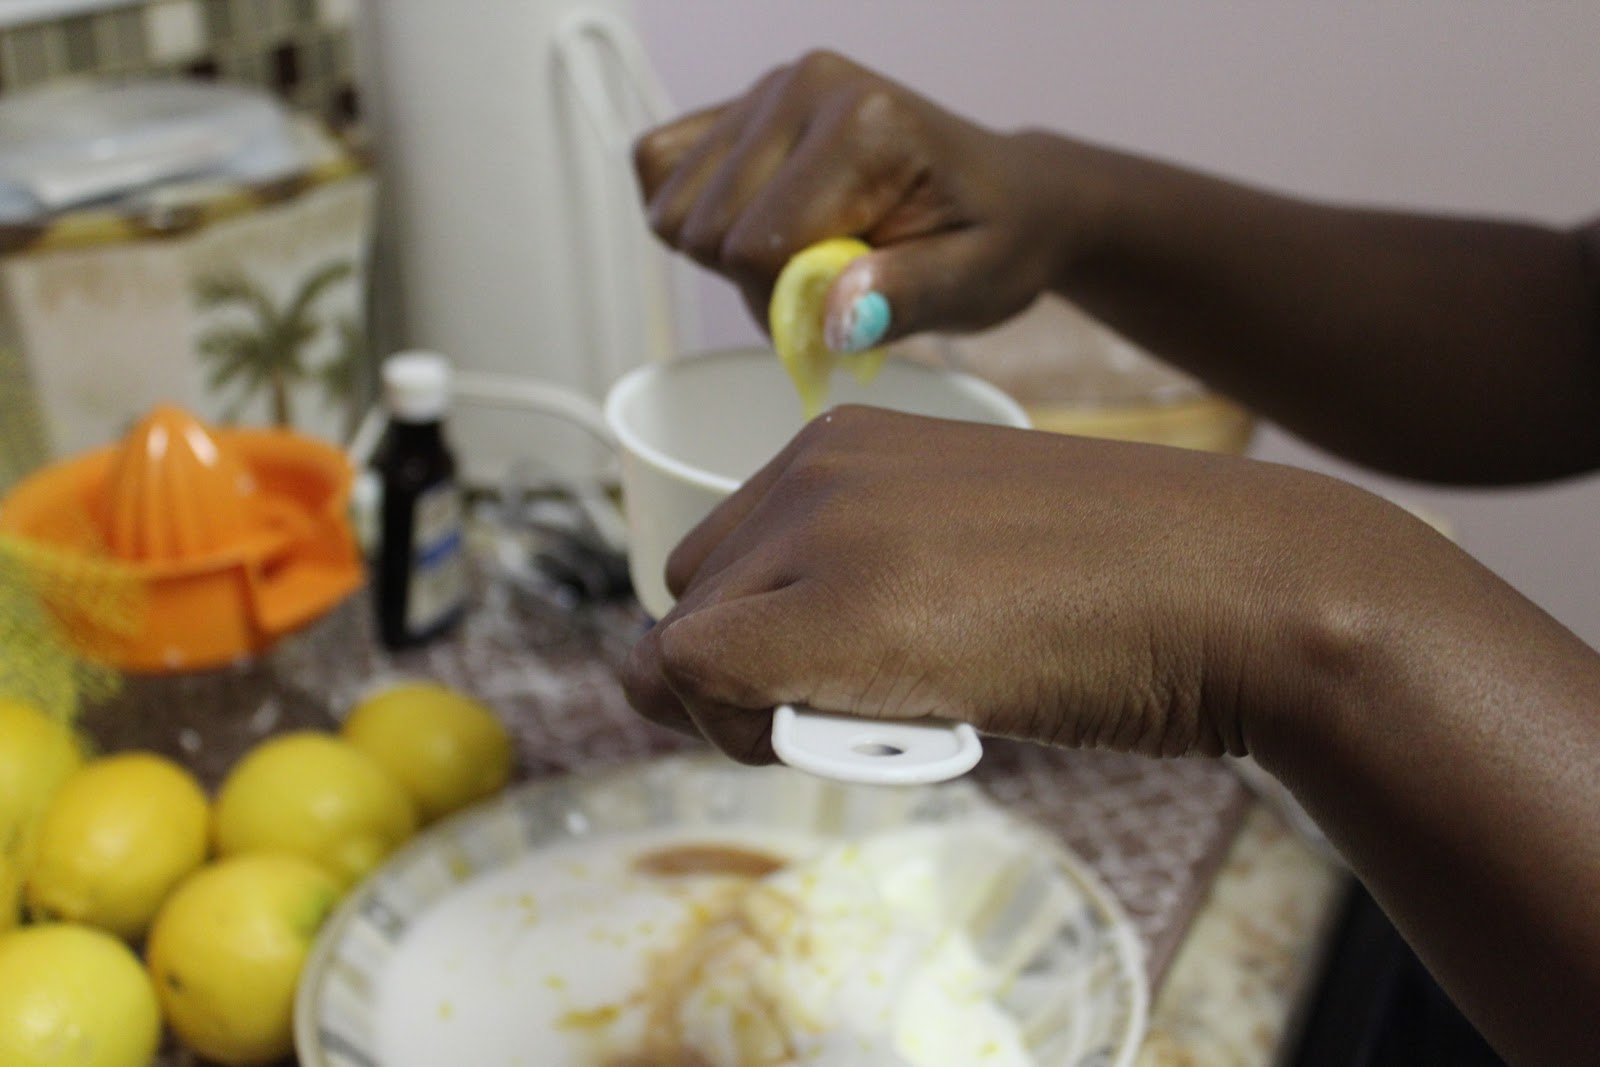
Squeeze your Lemons (rolling them before squeezing, helps with getting all the juice)


You just need enough for a cup!


Step 3:

In a pitcher, mix Lavender water, Lemon Juice, Sugar and Water !


Super easy and super yummy!


Hope you enjoy!


Popular Posts

INSTA FEED